1. If you are using Linux you will probably already have GIMP installed or you can install it from your package manager. If you are on Windows or Mac you will need to download and install it from here: http://www.gimp.org/
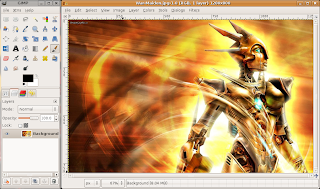
2. Now to get started open up your GIMP. It should load up with a Tip Of The Day window and also a tool bar window. Now to open up a image that we would like to edit we just goto the tool bar window and navigate to file > open. From here you just browse to the image you would like to open and simply click open and it should open you picture in a new separate window.

It should look something like this
3. Now to start editing the image. Lets start with something that everyone will use.
Cropping Tool: To open up your cropping tool right click on your image > Tools > Transform Tools > Crop (shift + C if you like using hot keys). Now you just click and drag the area that you would like to crop. The light area will be what your image will look like after you crop it and the darker area will be the part that will get cut off. If you need to adjust the area just click and drag the edges to where you would like them to be. When you are done and you want to accept the changes you just hit enter.
Cropping Tool: To open up your cropping tool right click on your image > Tools > Transform Tools > Crop (shift + C if you like using hot keys). Now you just click and drag the area that you would like to crop. The light area will be what your image will look like after you crop it and the darker area will be the part that will get cut off. If you need to adjust the area just click and drag the edges to where you would like them to be. When you are done and you want to accept the changes you just hit enter.
Before the crop and after the crop
Brightness and Contrast: This is a very simple tool to use and also a very common tool. You can navigate to this tool by right clicking on the image again > Colors > Brightness and Contrast. Then a small window will pop up with some sliders for you brightness and your contrast. To make the image brighter just drag the brightness slider to the right and drag to the left to make it darker. You should see your image changing when you are moving the sliders around if it is not you make need to put a tick in the preview box. Then when you have your values that you want you just click OK to apply the changes.
Brightness and contrast pop up box
Those are just a small portion of the tools that come with GIMP but if you play around with it a bit you will be able to learn to do a ton of different things. The tools listed above should just get you started with cleaning up some of your photos that you have taken. If you would like to learn more about GIMP you should take a look at these tutorials here: http://meetthegimp.org/. I have learned a wealth of information from those tutorials. Just remember to have fun and be creative.


2 comments:
jack, you are doing real well. I am posting this from my Fedora. Still trying to get my German keyboard to work. It is a pain because not all the letters are at the same place. And the special characters I cannot even find. Regards, whs
Thank you and I hope that you enjoy linux as much as I do.
Post a Comment