Since it is getting to be around the time of Halloween you may want add some creepy text to some of you pictures or maybe just want to make something cool for Halloween. So lets get started on this project.
Just as before you will need to have GIMP installed to understand this tutorial you can get a free copy of it here:
http://www.gimp.org/OK now you will need to start up GIMP. You will then need to navigate to
File > New. A window will pop up to create the size of your new image I chose 800X400 pixels but you can choose according to what you want to make.

Create New Image Window
Now you should have you new image open. Now to start off we are going to simply select the
Text Tool from the GIMP menu it's the one with a big
A. Then you just click on any part of the image and just type what you want. I just typed GIMP for this tutorial but you can type something else and it will work just as good and if you use all capitals it seems to look and work better.

These are the letter settings that I used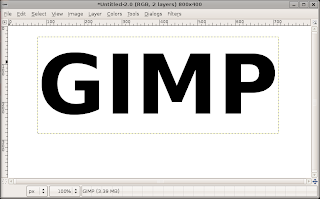 This is how mine looks like so far
Now that we have the letters done we are going round the corners of the image. To do this we are going to add a
Gaussian Blur. You will need to navigate to
Filters > Blur > Gaussian Blur. A little window will come up with the settings for the
Gaussian Blur tool. Just copy the settings from the image below. Then hit OK.

You should set your Gaussian Blur to 20 pixels
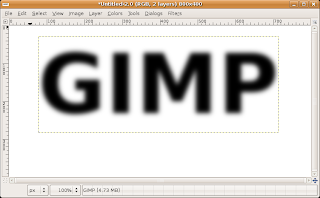 Image after the Gaussian Blur
Now to you need to goto the layers tab on the GIMP window and right click on the layer with your letters and select
Merge Down. Now to get the rounding effect on the letters you need to navigate to Colors > Threshold. You will then want to move the slider until your letters look rounded and bigger.
 The Threshold tool is used to round the sharp corners of the image
The image after the Threshold tool is applied
It is now time to get started on making these letter look more bloody. You will now need to click on the
Brush Tool it is the one that looks like a little paint brush from the GIMP window. Now you will need to draw lines coming down from the letters to give the effect of the blood dripping down. You will then need to change the size of your brush to fit you image it will depend on how large your letters are. To make strait lines you will need to make a dot where you want the line to start then hold in the
Shift Key and then draw the line to the point where you want it to stop. Your image should look somewhat like the one below.

Image shows how the lines create the blood dripping effect
To make it look more like blood dripping we are just going to make our brush a little larger. Then just add dots to the ends of the lines and in the corners where the lines start.
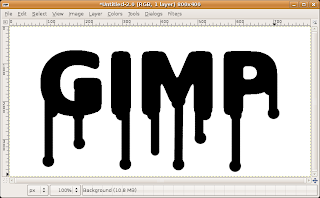 Shows the dots on the ends of the lines and in the corners of the letters
Now that the dots are done you will have to go back to the
Gaussian Blur Tool (Filters > Blur > Gaussian Blur). Just use the same settings as before it should come up with the last settings used or if it doesn't put in 20 pixels.

Gaussian Blur Tool set to 20 pixels
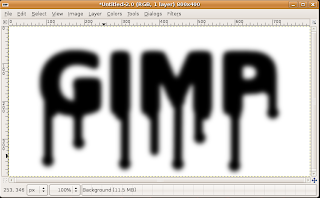 Image after Gaussian Blur applied
You will now need to go back to the
Threshold Tool again by going to
Colors > Threshold. Instead of like before when you made the letters larger and rounded the edges. You will now want to make them really skinny to give them a really nice blood effect.

Moving the slider on the Threshold Tool to the left will give you the desired effect
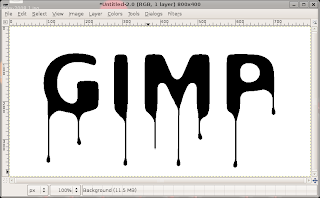 This is the effect you will want to get
After you have that done you will want to duplicate the background layer. To do this all you have to do is right click on the background layer then select
Duplicate Layer it is toward the top. You should now have 2 identical layers. You will want to take out the white of your top layer now and the tool that you need to use is the
Color Tool. Then you just click in the white space to select the white and hit the delete key to get rid of the white space. Now create a duplicate layer of the top layer by just right clicking on the layer and selecting
Duplicate Layer. Now with the new top layer you are going to use the
Color Tool again but select the black letters. Then you will need to click on the
foreground color and choose a red that looks the most like blood (usually a darker one works best). Then you just need to
drag and drop the color onto your image.

The image after you add in the red
You will now want to select your bottom background layer again. Now you have to navigate to
Colors > Invert. Now you are going to go back to the
Gaussian Blur Tool again
Filters > Blur > Gaussian Blur. This time you will want to set it higher like around 36 or so.

Your image should look close to this depending on
how much Gaussian Blur you usedYou will now be making a
Bump Map this will give you a the finished blood look that you have been waiting for. You will need to select the top layer again. Then you will need to navigate to
Filters > Light and Shadow > Lighting Effects. This will open a window and you will need to goto the
Bump Map tab. Then put a tick in the
Enable Bump Mapping and the
Bump Map Image should be the bottom on the list from the drop down menu. Now you need to goto the
Light tab. You will need to change the
Light Type to
Directional for both light 1 and light 2. Then click OK and it will just take a little while to load the Filter onto the image.
The finished image
Then you are done making your bloody letters. If you want to play around with some of the settings you can get a ton of different looks or you could try to do different colors for the blood. Just remember to have fun with it and try to do different things with it to get the effect that you desire.


