Sunday, November 23, 2008

Installing Telnet In Windows Vista

So the other day when I was booted into Windows Vista I wanted to play some old BBS games that I haven't played in a while using Telnet. This is where I noticed that Telnet isn't installed automatically in Vista like it is in XP. This is a very simple fix though and can be done in a matter of just a couple minutes. So let me show you how.

First you will need to click on the the Start Menu (Vista Globe). Then select Control Panel. From here you will need to select Programs and Features in the Control Panel window.


The Programs and Features window

Now in the side panel in the window you will need to select Turn Windows Features on or off. You will then seen a window pop up with a list of a bunch of things. You will need to scroll down to Telnet Client and then put a check in the box and then click OK. From here Windows Vista will install Telnet on your system.


Windows Features window

Now you should have Telnet installed in Windows Vista. The installation may seem like it is stalled but it will install after a bit or at least it did on my machine for a little bit. Have fun with Telnet.

Friday, November 14, 2008

Removing The Background Of A Picture Using GIMP

Have you ever spent a long time trying to delete the background of a image in GIMP or Photoshop and thought that there has to be a faster and easier way. Well there is a method that I use and it seems to be pretty quick and easy enough for most of the projects that I have done. To do this I will be using GIMP so if you do not have it installed already you can get it from here: http://www.gimp.org/.

To start off you will need to open the image that you want to get rid of the background on. To do this you will just need to navigate to File > Open and then just browse to where the image is saved on your hard drive. Once you have the image open you will need to go to the Paths Tool in the Toolbox window it is the that looks like a pen. Now what you will need to do is just click on the border of the image to create a small dot. Then to create a path around the image just click around the image to create a path all the way around. Then once you click back on the first dot it will leave a open space between the last and first dot.


Image with path drawn around it

Now after you have you path around the whole image you will need to go to the Toolbox window and click on the Tool Options tab. You will then need to click on the button that says Selection From Path. This should now make your path into a selection.


Image with a Selection Path around it

Now you just have to press Ctrl + C to copy the selection then press Ctrl + V to paste the image back onto the image that you already have. Now you will have to click on the New Layer button in the Layers tab in the Toolbox window. This will now put your pasted image onto it's own layer. From here you will need to select the background layer and then click on the Delete Layer button. Now you should just have you image with no background.


Image with no background

From here you can be done or you can move on and just copy and paste this image onto another one and resize if needed. If this method does not seem work the greatest for you or if you think that you have a better way on how to do this you can post it in the comments or you can send me an e-mail at thegeekylife@gmail.com. This method does seem to work very well for me though in the past and just remember to have fun with it.


Thursday, November 13, 2008

Fully Uninstall Programs In Windows Using Revo Uninstaller

If you have ever noticed that when you uninstall a program in Windows there are usually little pieces left behind. These can sometimes be bothersome because you have thought that you already got rid of the program but it is still on your hard drive. There is a simple tool to help you through this process though and it is called Revo Uninstaller. What this little program does differently than your normal uninstall is that it will search you hard drive for the little pieces that are left behind. You can get your free copy of Revo Uninstaller here: http://www.revouninstaller.com/. So now lets take a look at what it has to offer and go through a uninstall.

After you have installed Revo Uninstaller you will want to start it up. You should then see a list of all the programs that you have installed on your hard drive it will look kind of similar to Add and Remove Programs in the Control Panel.
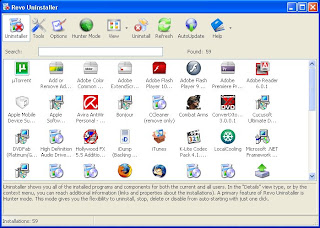

The main Revo Uninstaller window

Now to uninstall a program all you need to do is click on the program that you will want to uninstall and then toward the top of the window click on the button that says Uninstall. There will then be a little dialog box that pops up asking if you are sure that you want to uninstall the program and if it is the right program then just click Yes.


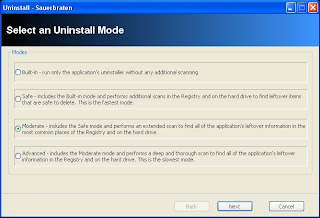
The uninstall modes window

Now you should see a window that has four different uninstall modes to choose from: Built-in, Safe, Moderate, and Advanced. All of them have a little description underneath of them to explain what they do. From here you just need to choose the option that best suits your needs. I am going to select Advanced because I want to make sure that there are no remains left on my hard drive after the uninstall. After you select the option you want to use just click Next. From here it is going to create a restore point, analyze the programs data, and it will also start-up the applications built-in uninstaller (if it has one).


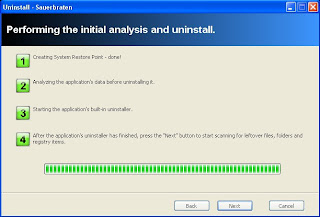
The start of the uninstall process


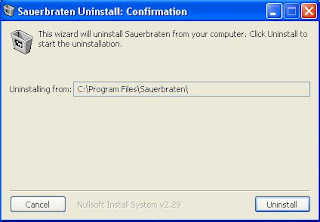
The applications uninstaller

Now you will just follow the on screen directions of the applications uninstaller. When you are done running the uninstaller you will then need to click Next. This will then go to a window that starts to scan your hard drive for any left over remains from the applications uninstaller.


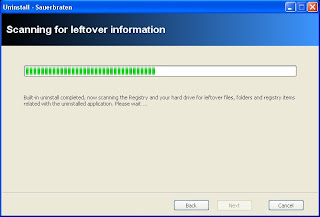
Scanning in progress
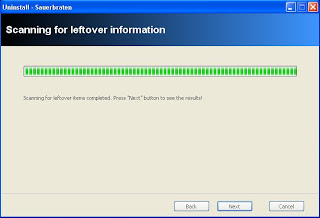

Scanning Finished

Once the scanning process is complete you will then need to click Next to continue on to the next screen.


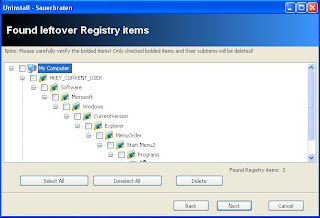
List of all the registry files left over from the uninstall

From here you will need to select the registry files that you want to delete by putting a tick in the little boxes or you can just hit Select All then hit Delete. When they are all deleted you can click on Next. Now it will either proceed to a window to show the left over files if there are any or it will go a screen that says that you are now done.


Finished

Now you are done with your uninstall and there should not be any remains of the program you uninstalled left on your hard drive. You will want to be careful with this program though because if you don't look through all of the files that you are deleting you may be deleting something that is important or a system file. So use with caution if you are using the Advanced or Moderate modes. This is a very helpful tool to use and can help to keep your things more organized and also keep you hard drive clean from all of the left overs that are left on your hard drive even after you have already uninstalled the program.

Tuesday, November 4, 2008

Setting Up The Desktop Cube In Ubuntu 8.10

Setting up the Desktop Cube in Ubuntu 8.10 is very easy and quick. The cube is a very nice addition to your Ubuntu install and also is very cool and fun to show to your friends using Windows. So lets get this started.

First you will need to enable Extra in the Visual Effects settings. To do this you will need to right click on the Desktop > Change Desktop Background > Visual Effects tab. Then just click the circle that says Extra. Now just click close.


Extra Effects Enabled

You will now need to install the Compiz configuration settings manager. To do this you will need to open up the Synaptic Package Manager by navigating to System > Administration > Synaptic Package Manager. Now type Compiz in the Quick Search bar. Then mark compizconfig-settings-manager for installation. After that just hit apply and it will now download and install the package.


Synaptic Package Manager

Now you will need to navigate to System > Preferences > Compizconfig Settings Manager. Now you will need to enable the Desktop Cube by putting a check in the little box by Desktop Cube. Then a little box will come up asking if you want to Disable the Desktop Wall and you click Disable Desktop Wall. While you are still in Compizconfig Settings Manager you will also want to put a check in Rotate Cube and Cube Reflection and Deformation. Now to add caps to the cube you will need to double click on Cube Reflection and Deformation.

Cube Reflection and Deformation Settings

Now you will need to click on Appearance and it will then drop down with some settings that you can change. To change the default caps you will need to click on New for the top and bottom caps and all you need to do is browse to a image that you would like to set as the top and bottom cap for your cube.


Appearance Settings Drop Down

Now if you would like to have something other than just the cube you can navigate to the Deformation tab and then from there you can select None, Cylinder, or Sphere from the drop down menu near the top of the window.


Deformation Settings

Now you are done setting up your Cube, Cylinder, or Sphere. There are many other settings that you can play around with but the ones I have shown here are just to get you started. Now to view your new effect you can either hold down Ctrl + Alt then click on the desktop or you can click on the desktop using the middle scroll button on your mouse if you have one. So now go have fun with you new settings and customize it to how you like it.


The Cube


The Cylinder


The Sphere